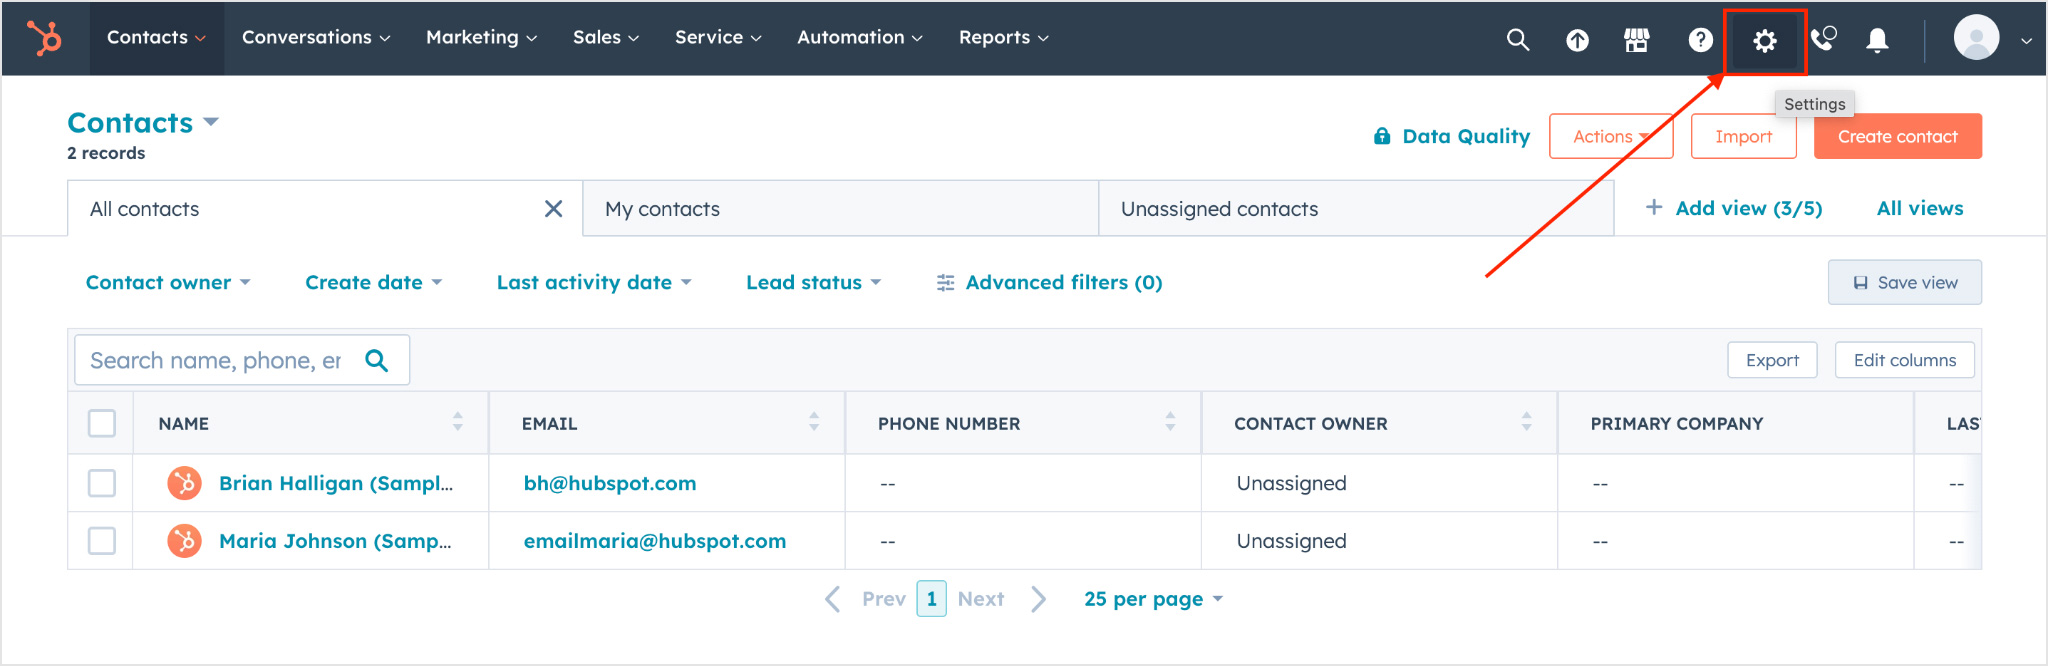
- Go to your account settings:
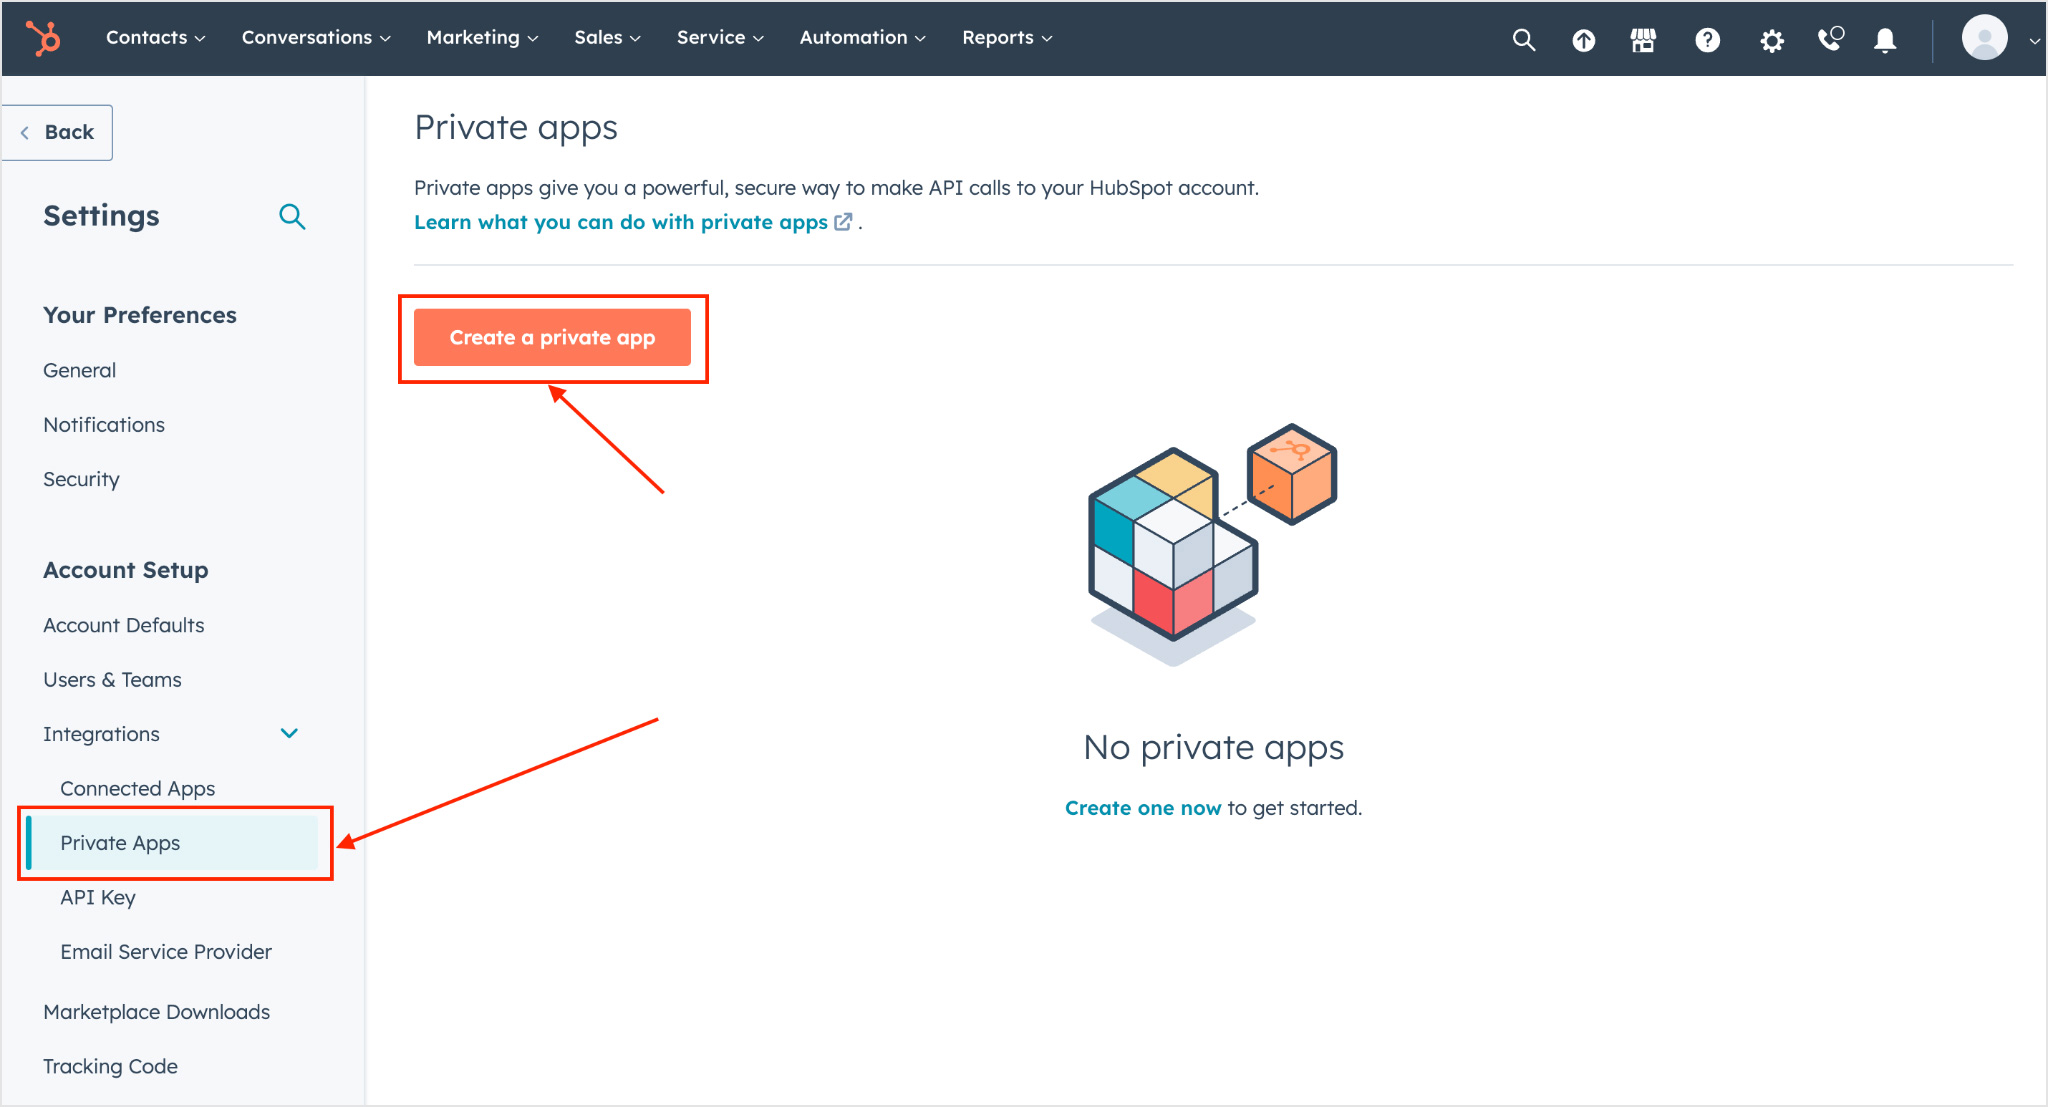
2. Go to Integrations -> Private Apps and click Create a private app:
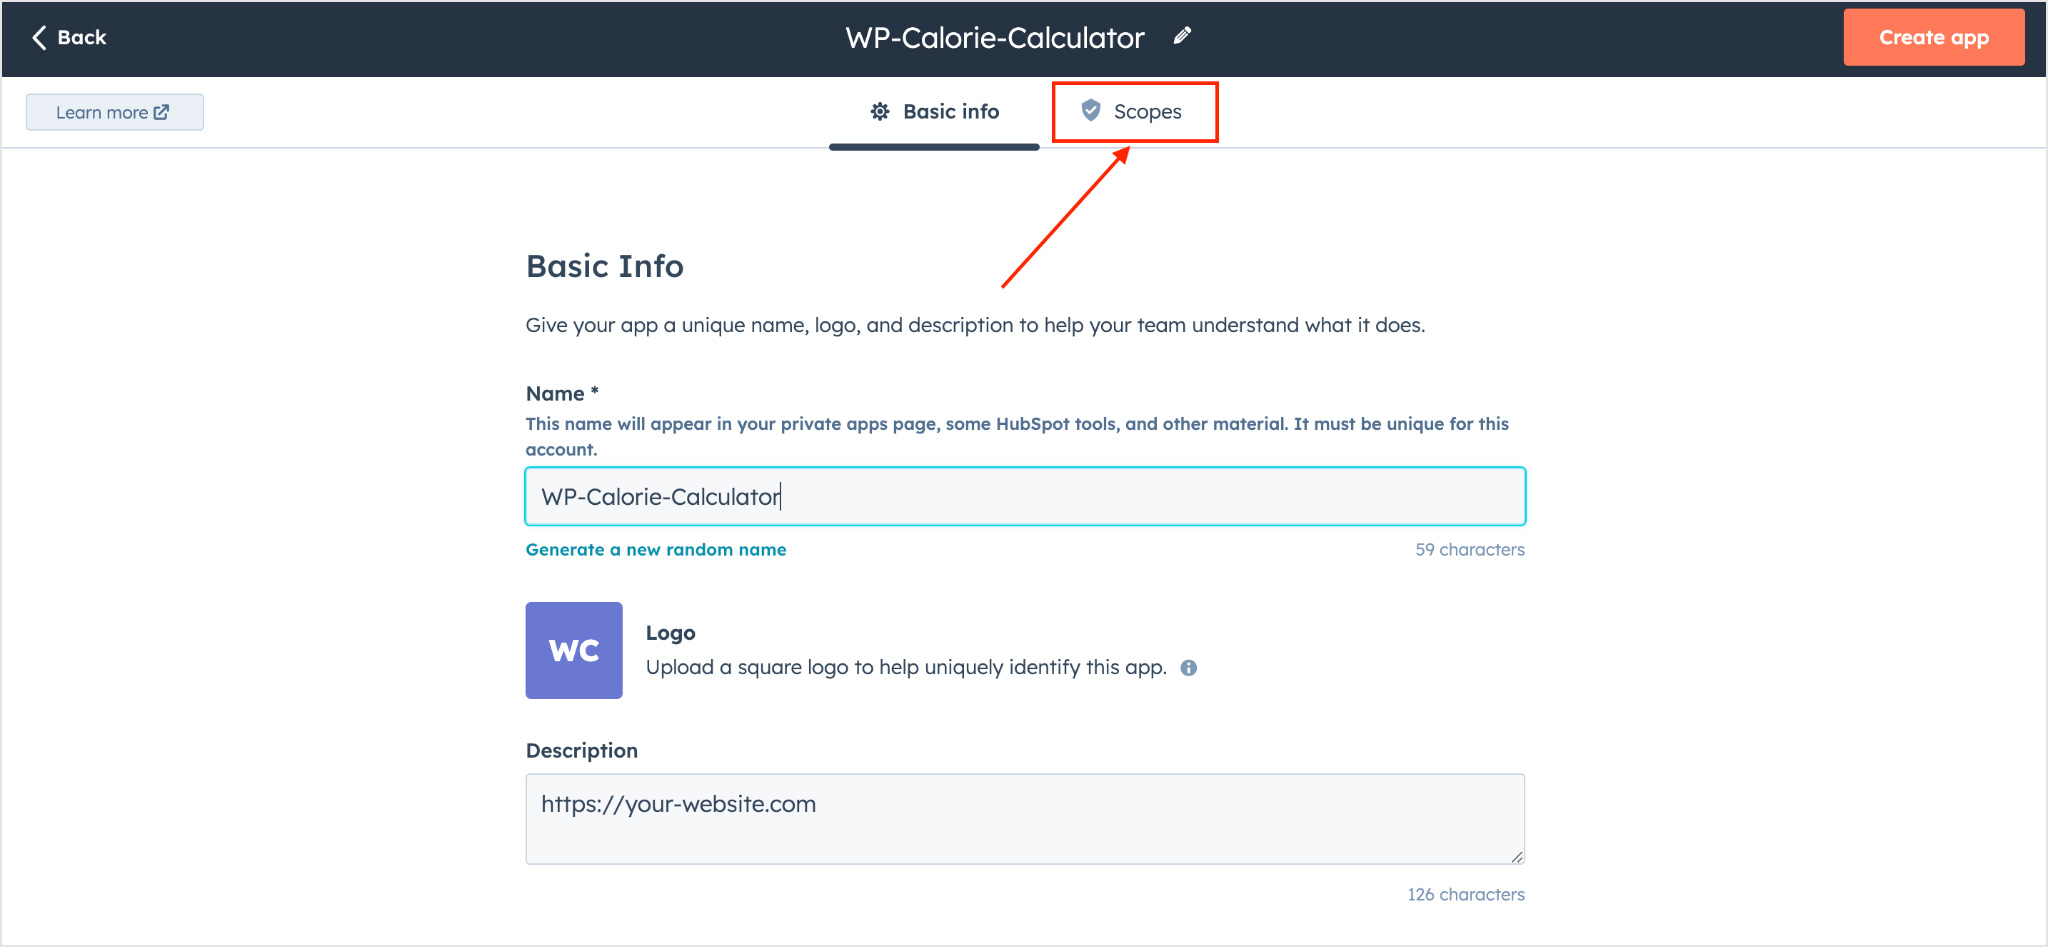
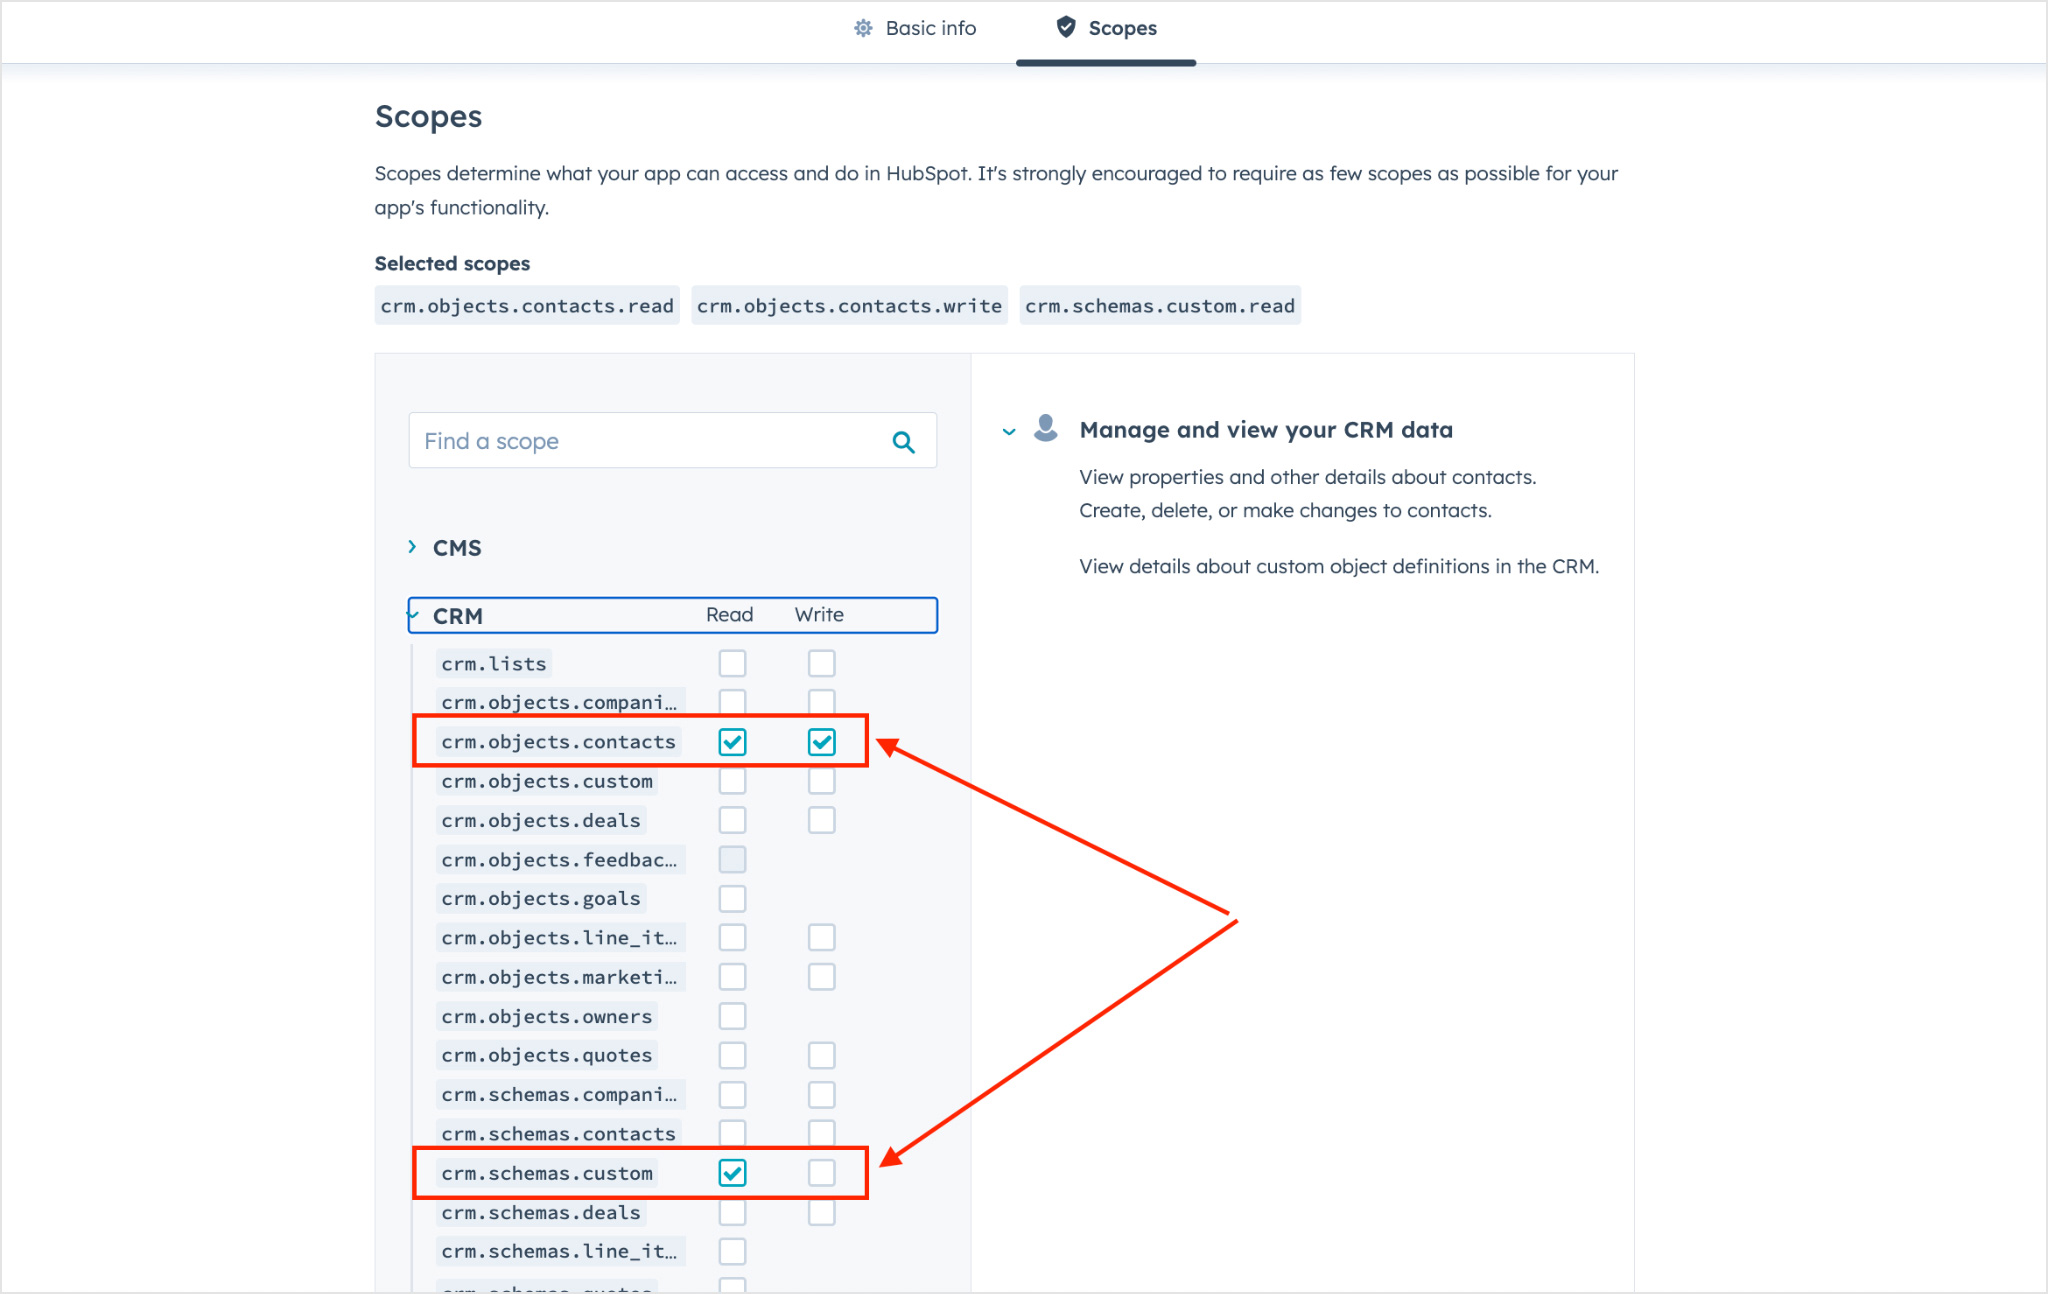
3. Enter the basic Token information, and then go to the Scopes section:
4. Enable permissions for crm.objects.contacts.read, crm.objects.contacts.write, crm.schemas.custom.read scopes. Click the Create app button in the upper right corner.
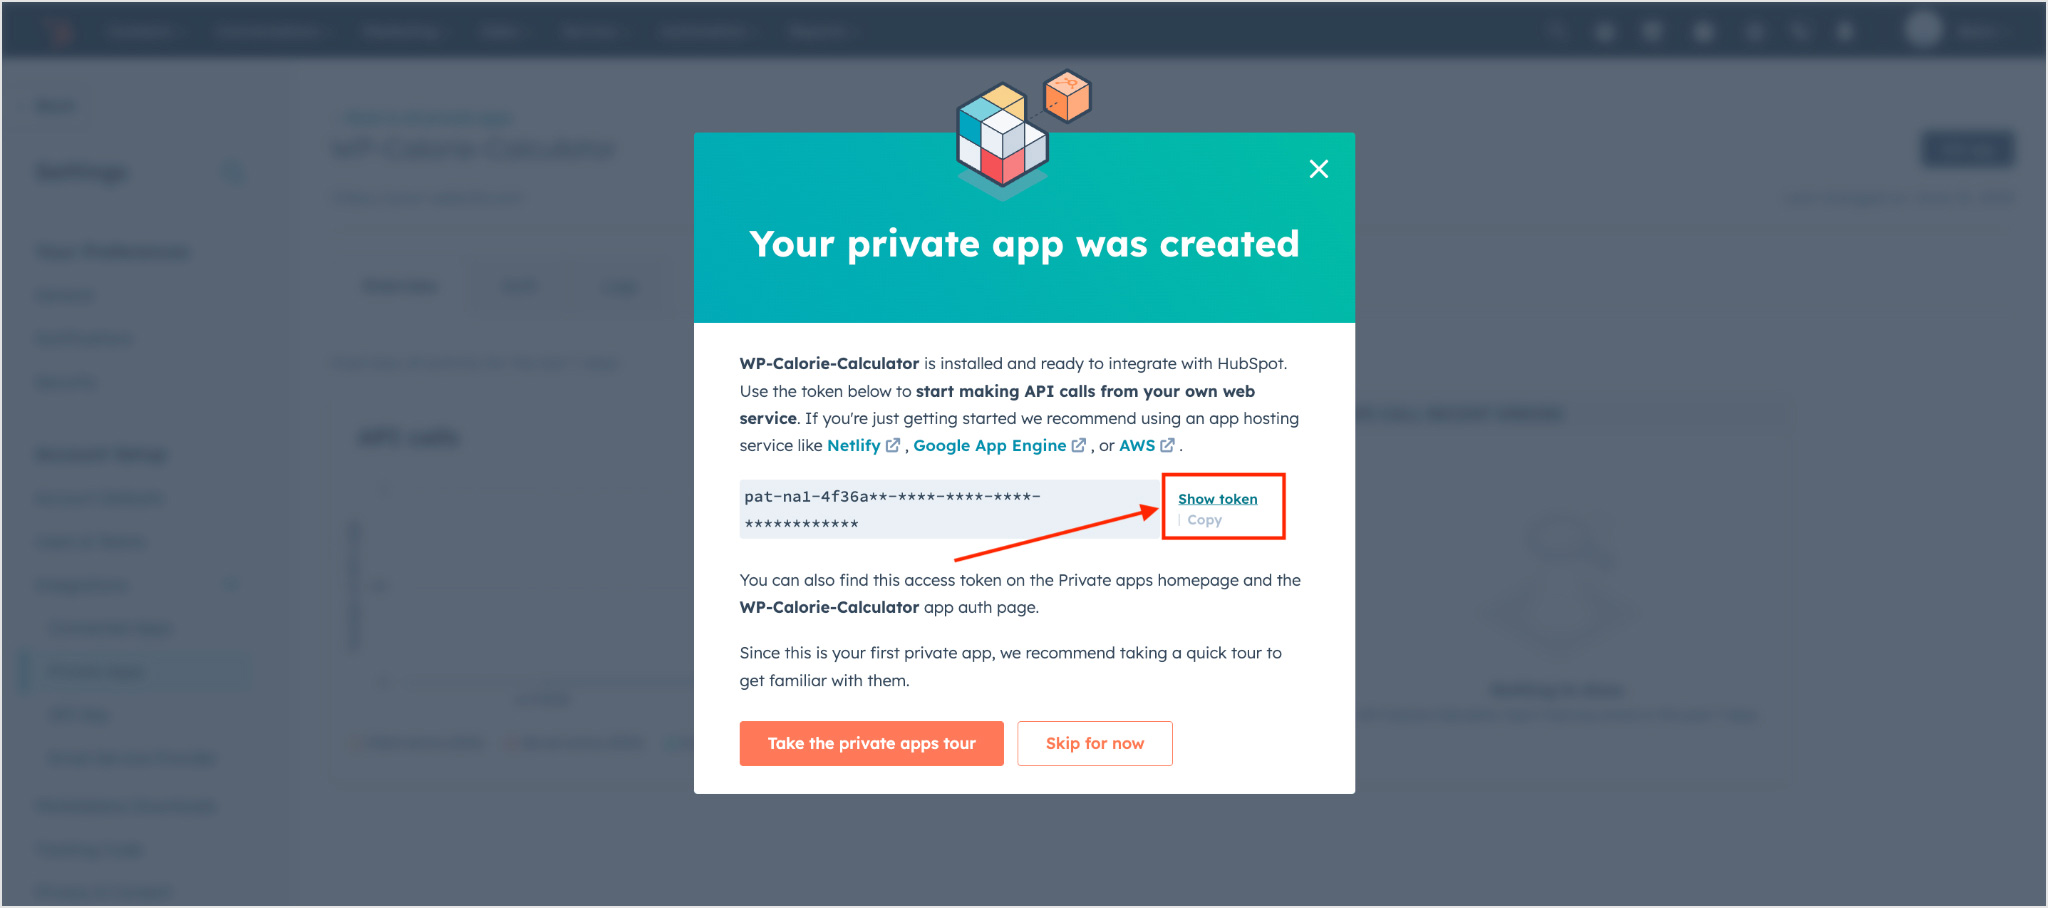
5. Click Show Token, then Copy and paste the Access token in the WP Calorie Calculator plugin settings in the integration section.
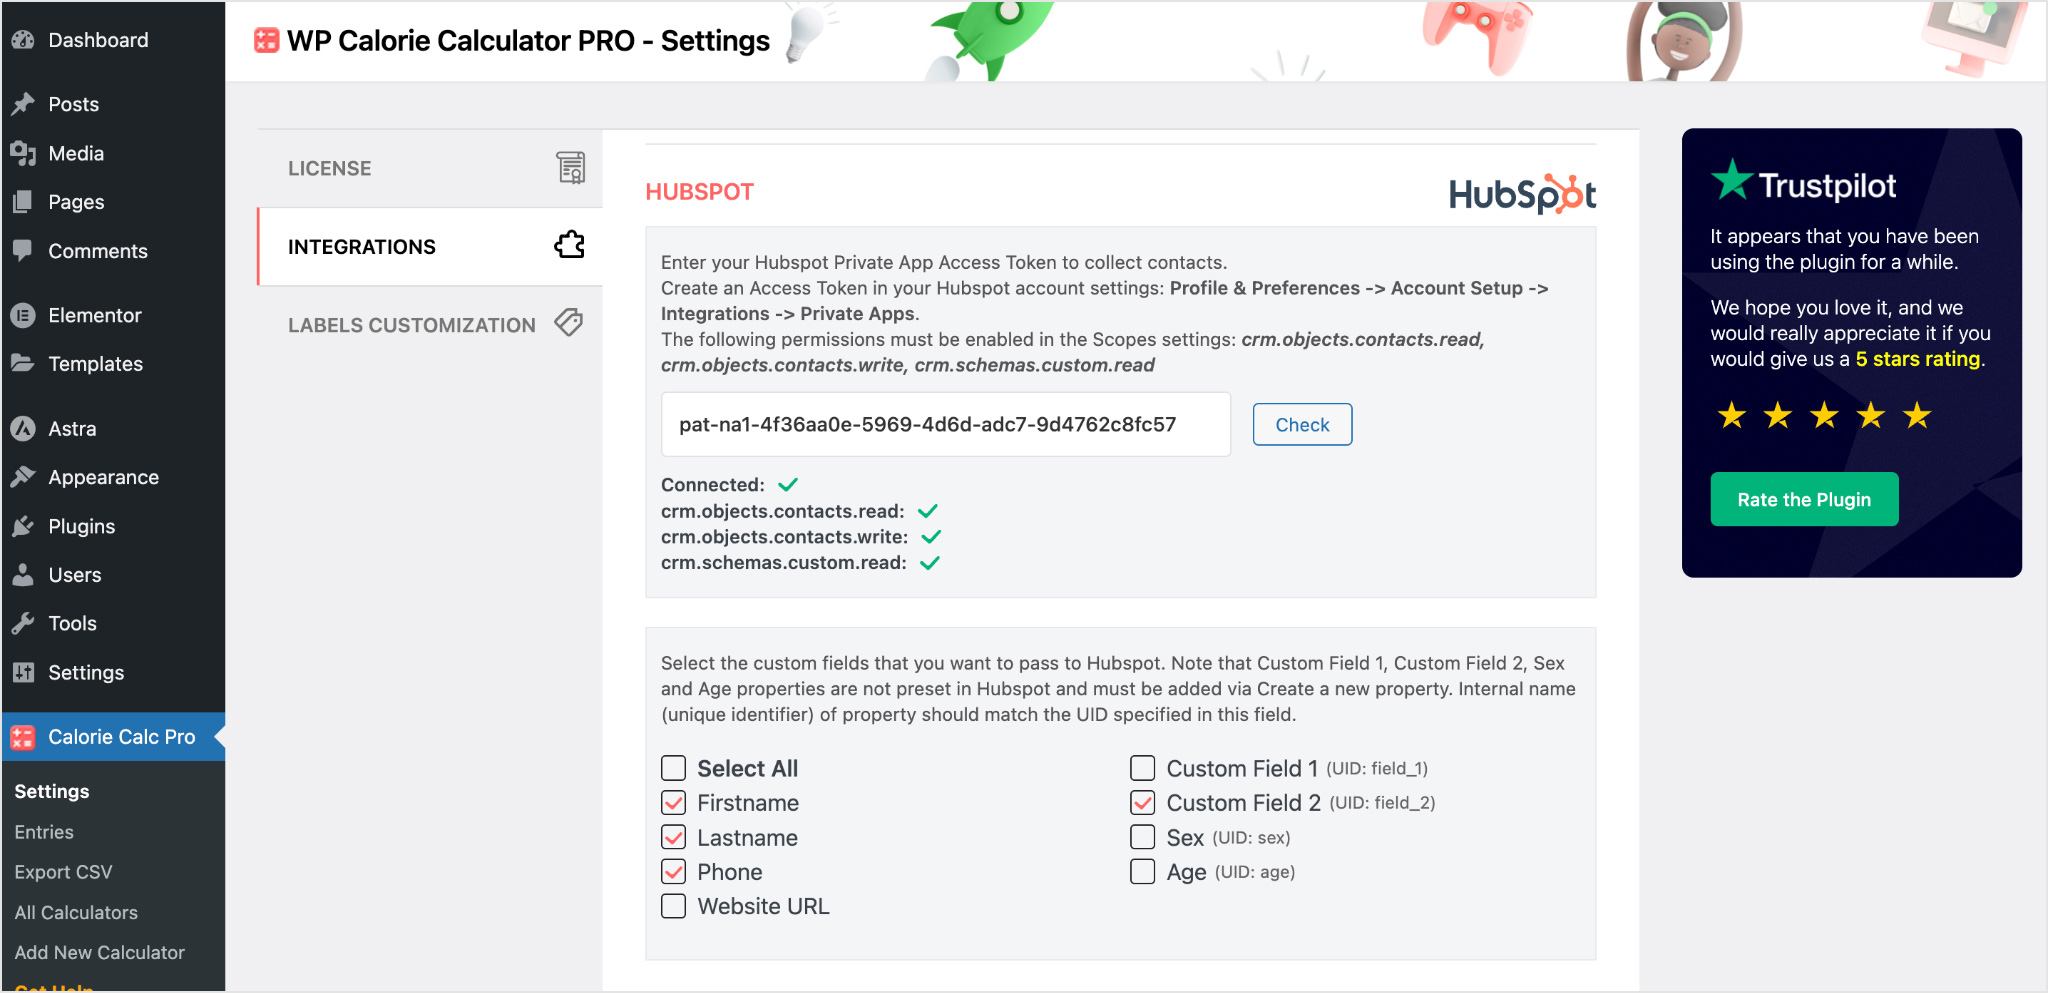
6. Click the Check button and make sure that all permissions are set correctly. Select the fields you want to pass to Hubspot. Save the plugin settings.
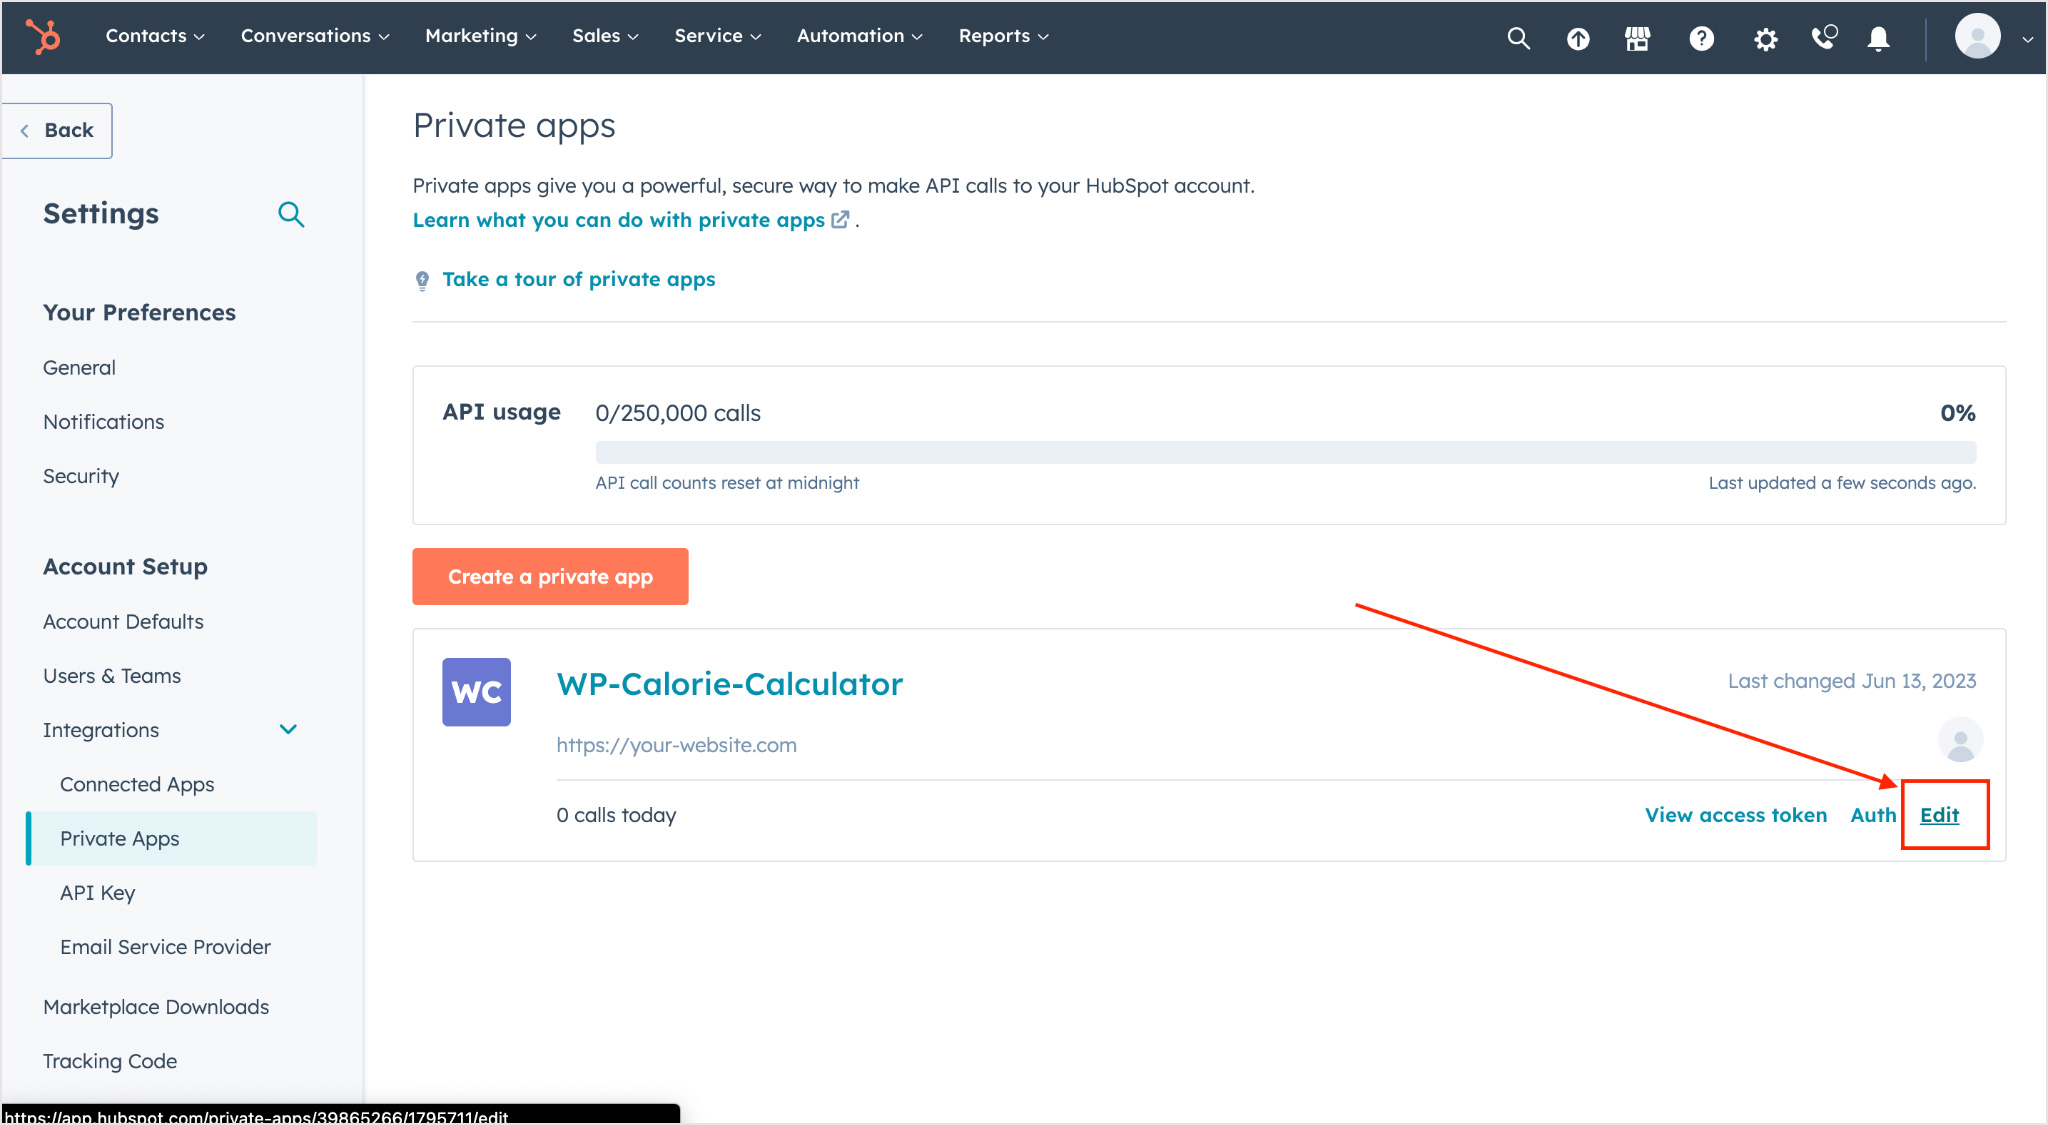
7. If the check shows that not all required scopes are enabled, go back to the Integrations -> Private apps settings, click Edit and enable them.
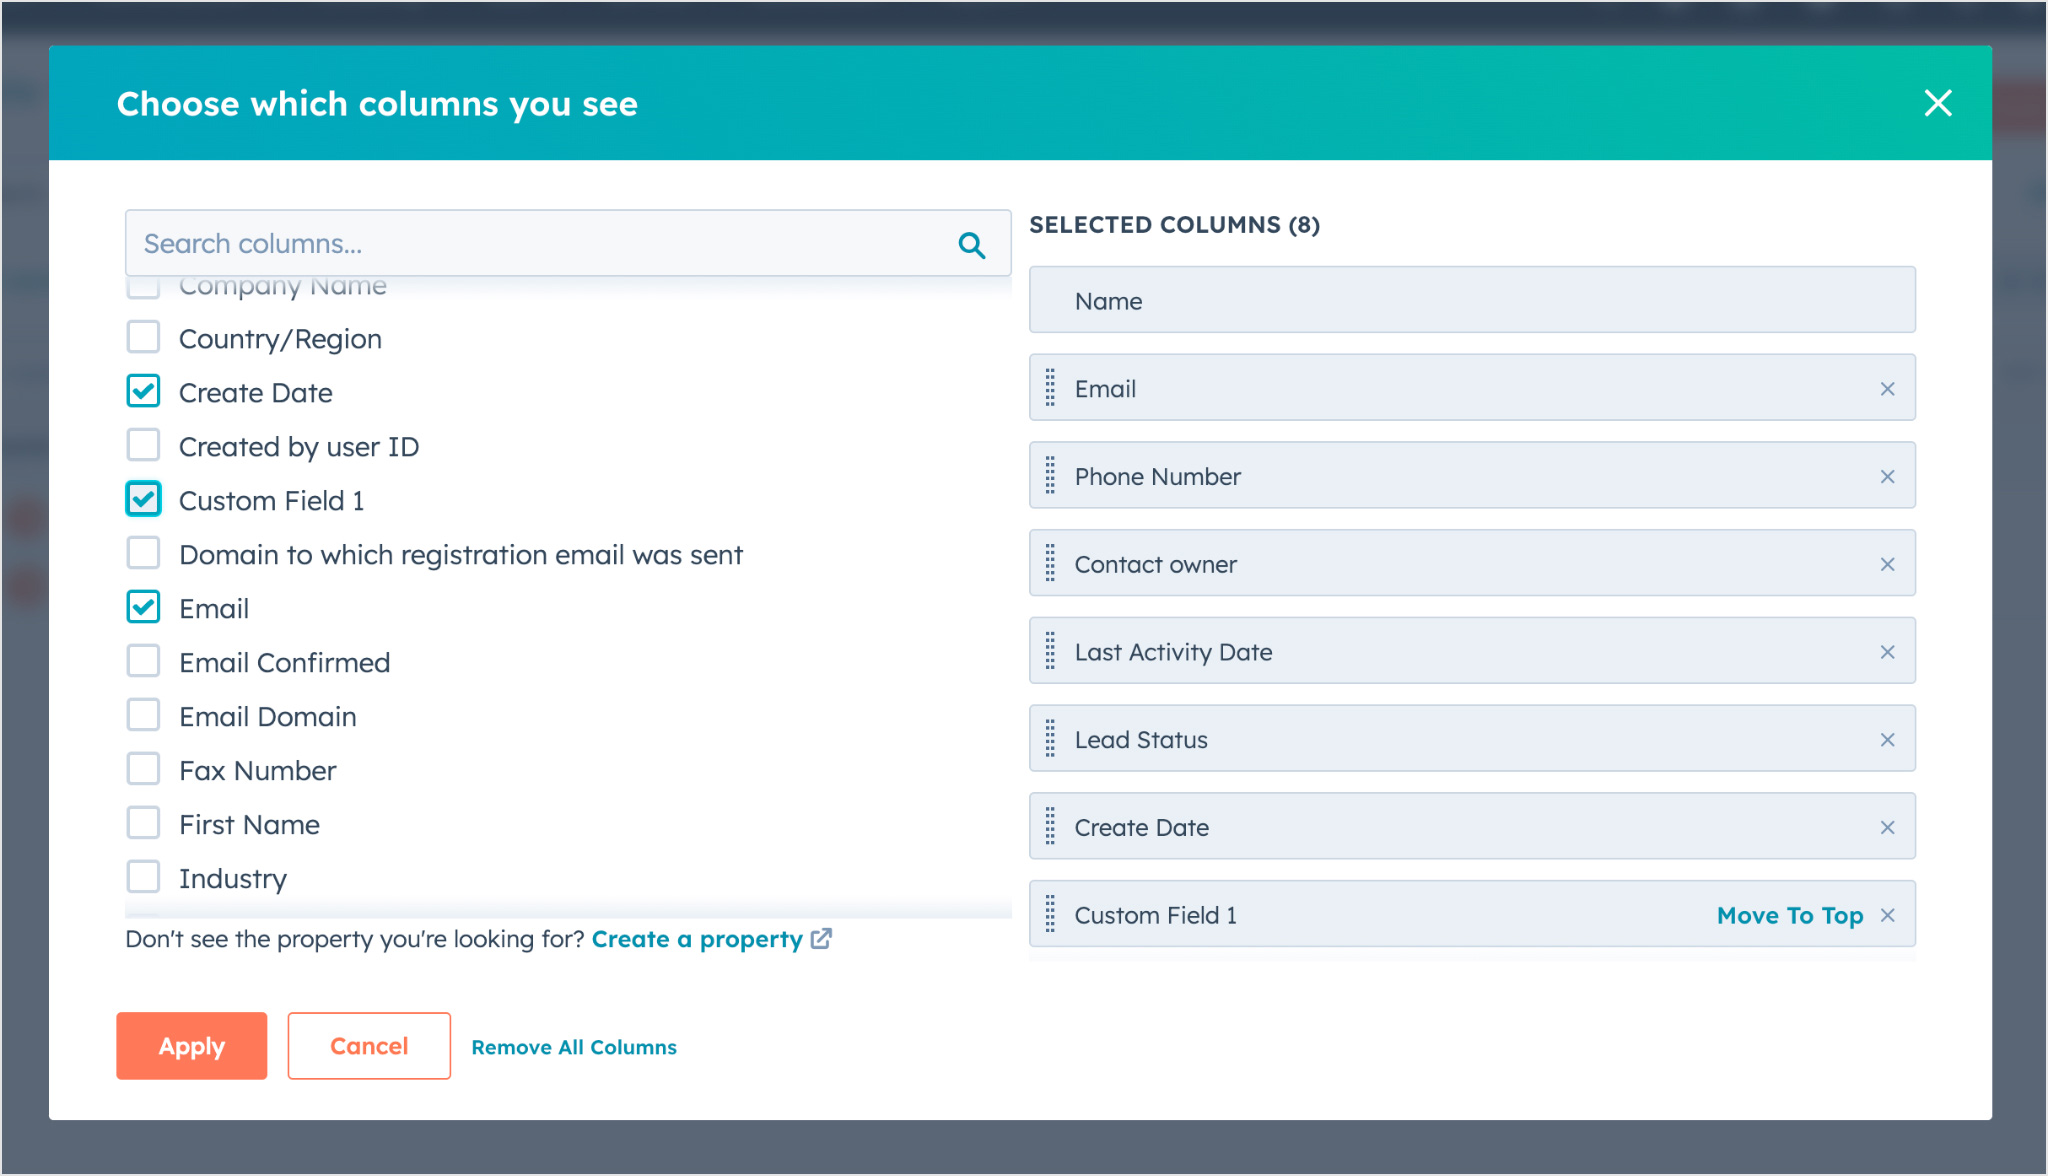
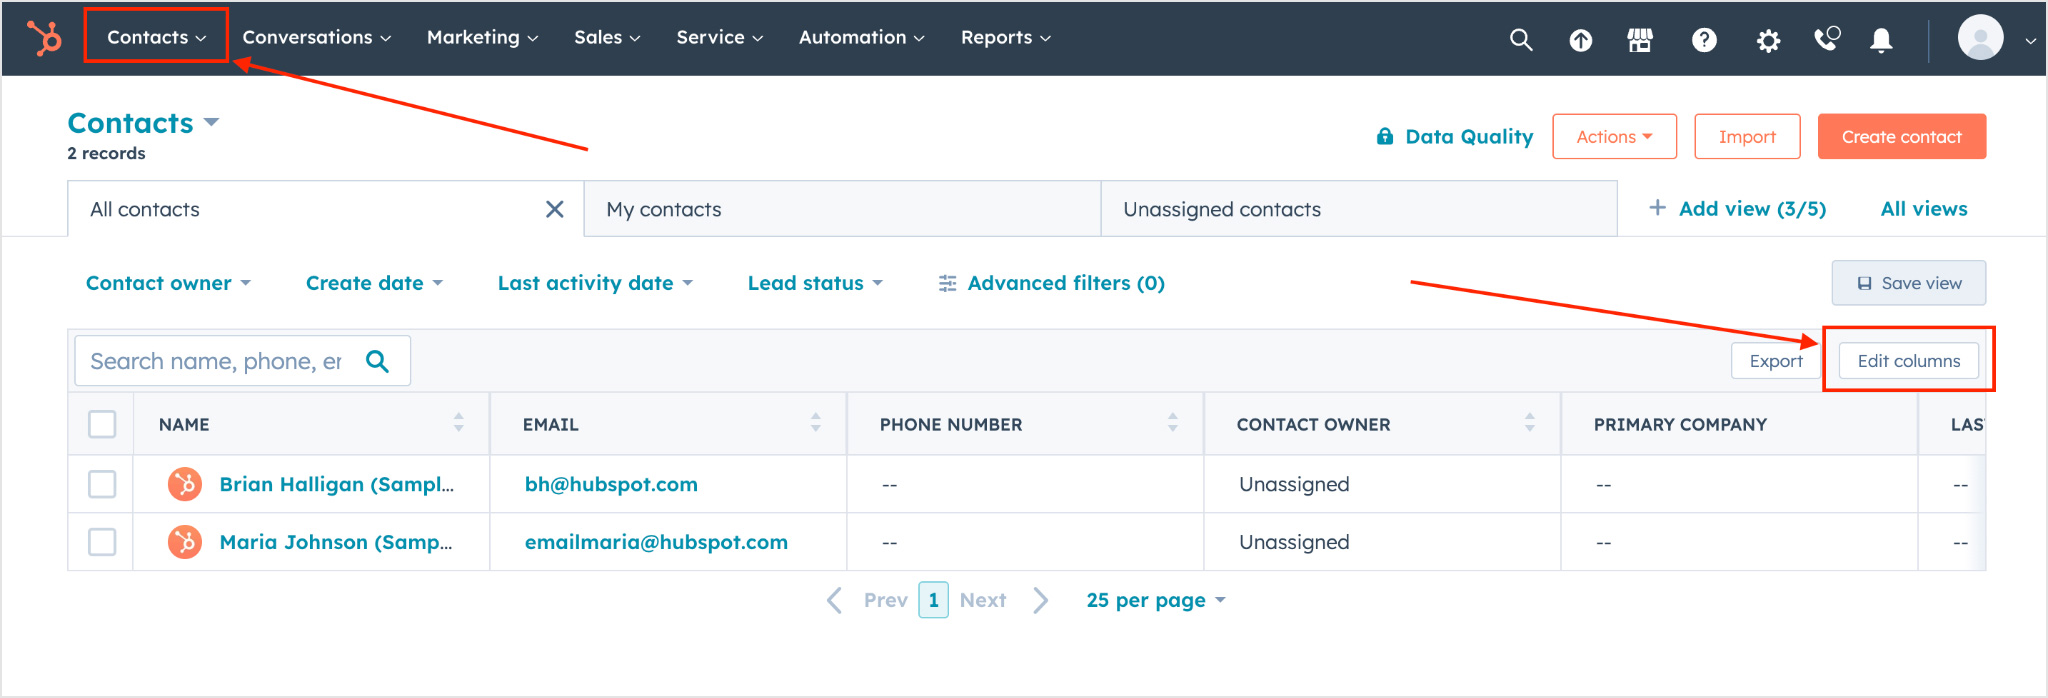
8. Custom Field 1, Custom Field 2, Sex, and Age fields are not preset in Hubspot and must be added using the UID listed next to the field name. To do this, go to the Contacts section of your Hubspot account and click Edit Columns in the contacts’ table.
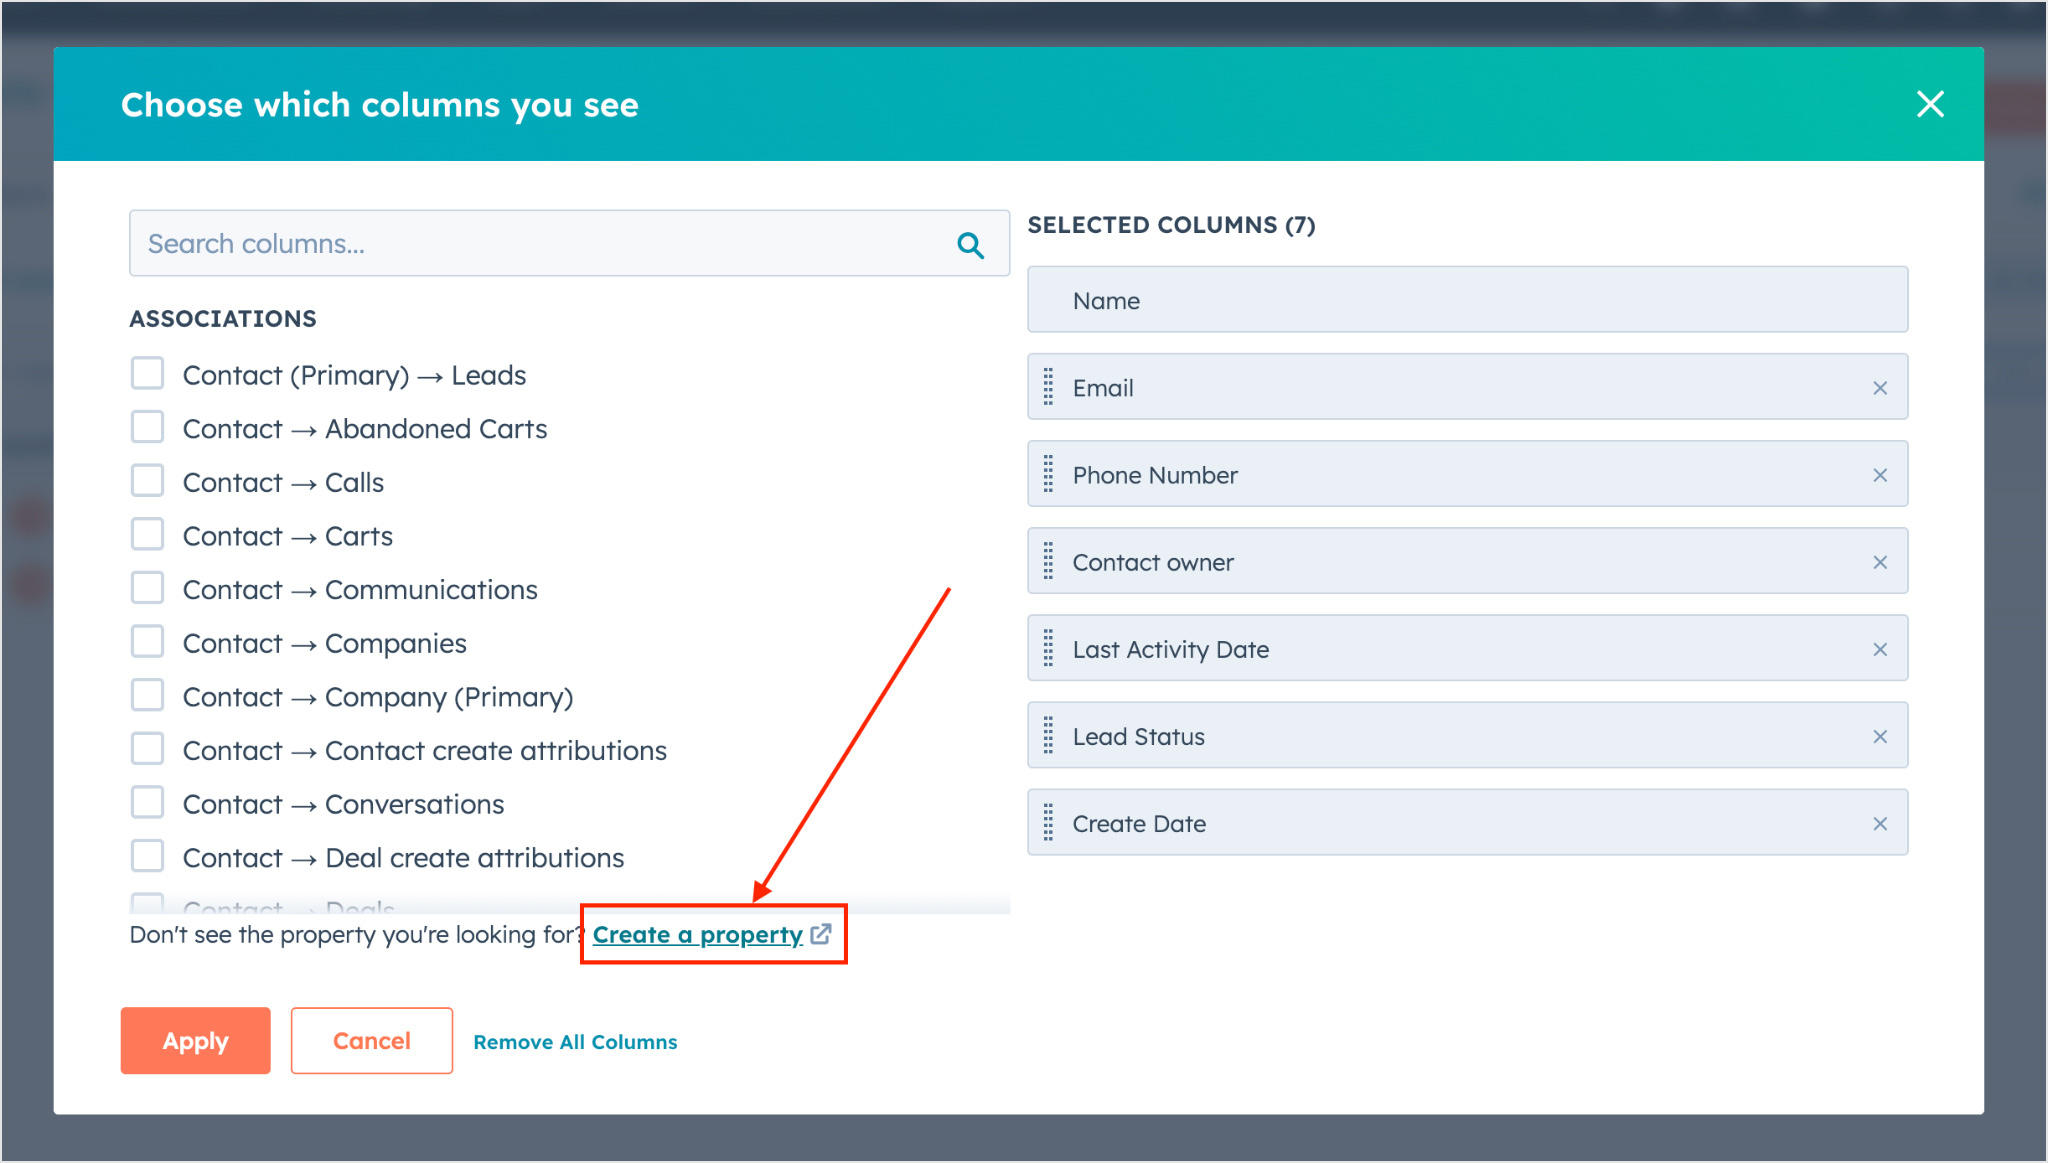
9. In the opened dialog box, click the Create a property link.
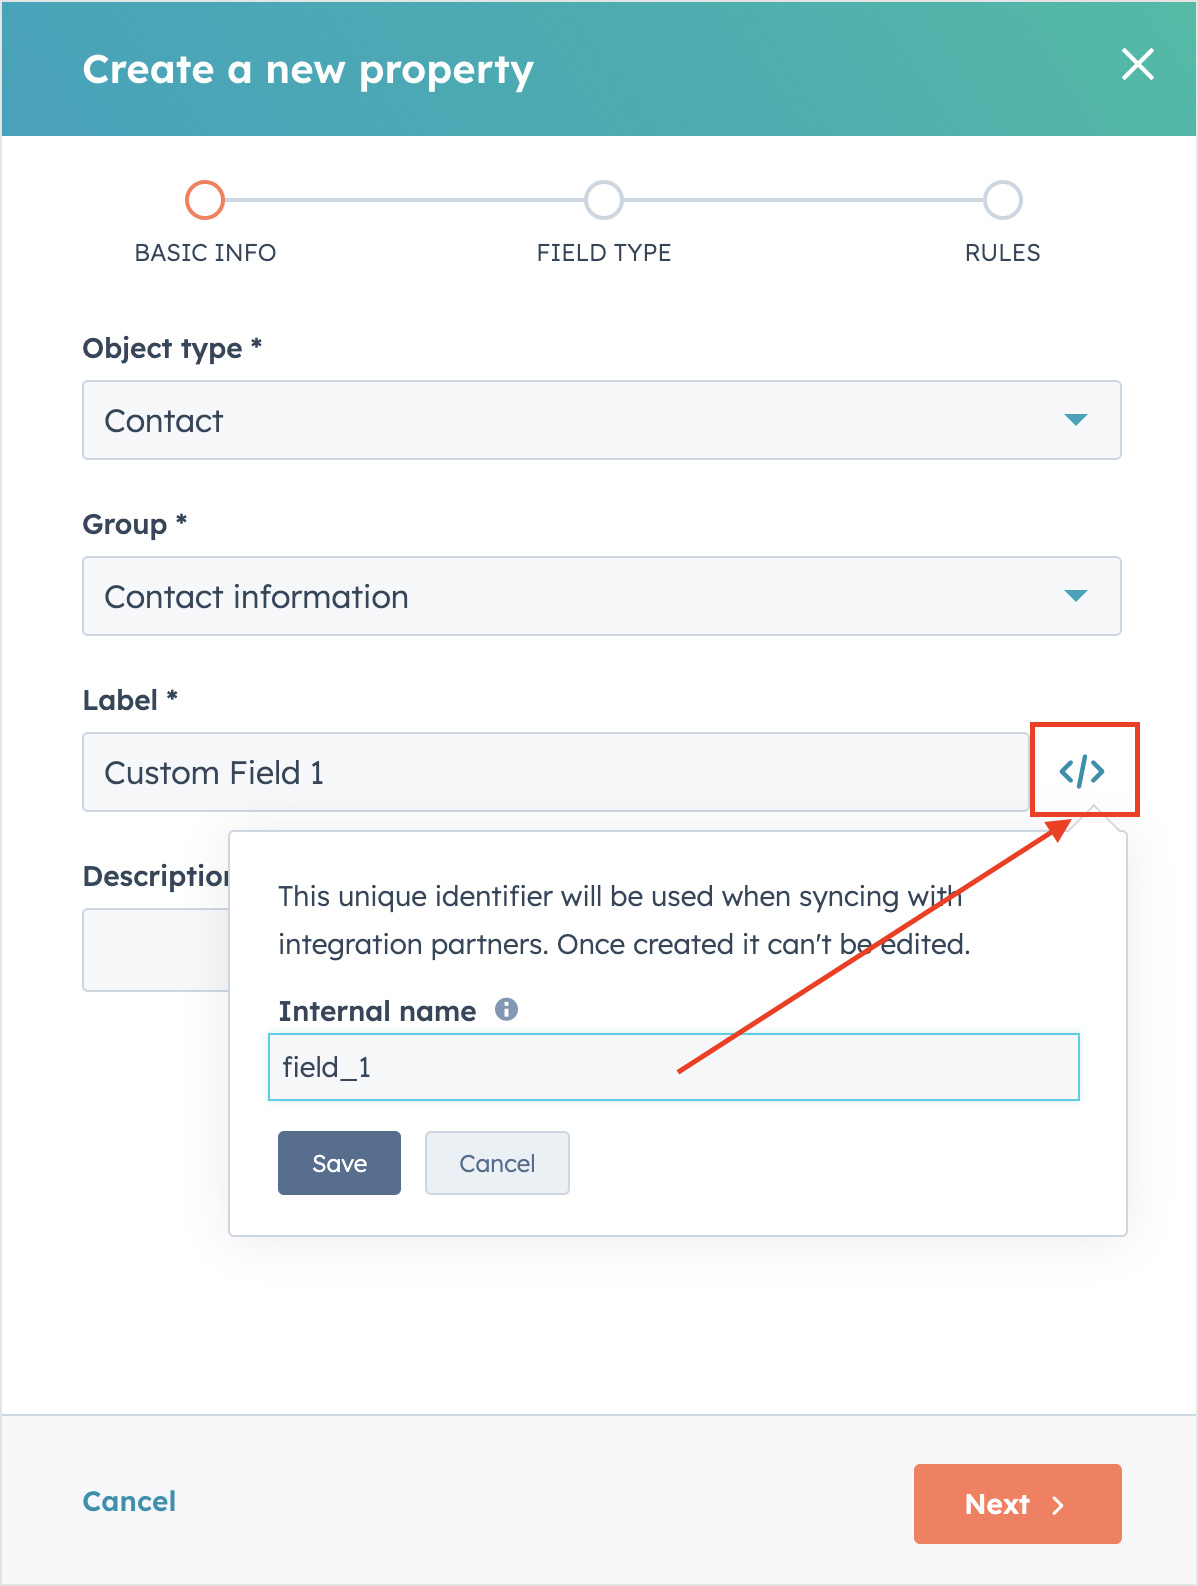
10. Select property type – Contact, group – Contact Information, fill in the field name, click on the icon to the right of the field name and enter the UID exactly as it is specified in the Hubspot integration settings. Click Next. Select property type – Contact, group – Contact Information, fill in the field name, click on the icon to the right of the field name and enter the UID exactly as it is specified in the Hubspot integration settings. Save the ID. Click the Next button.
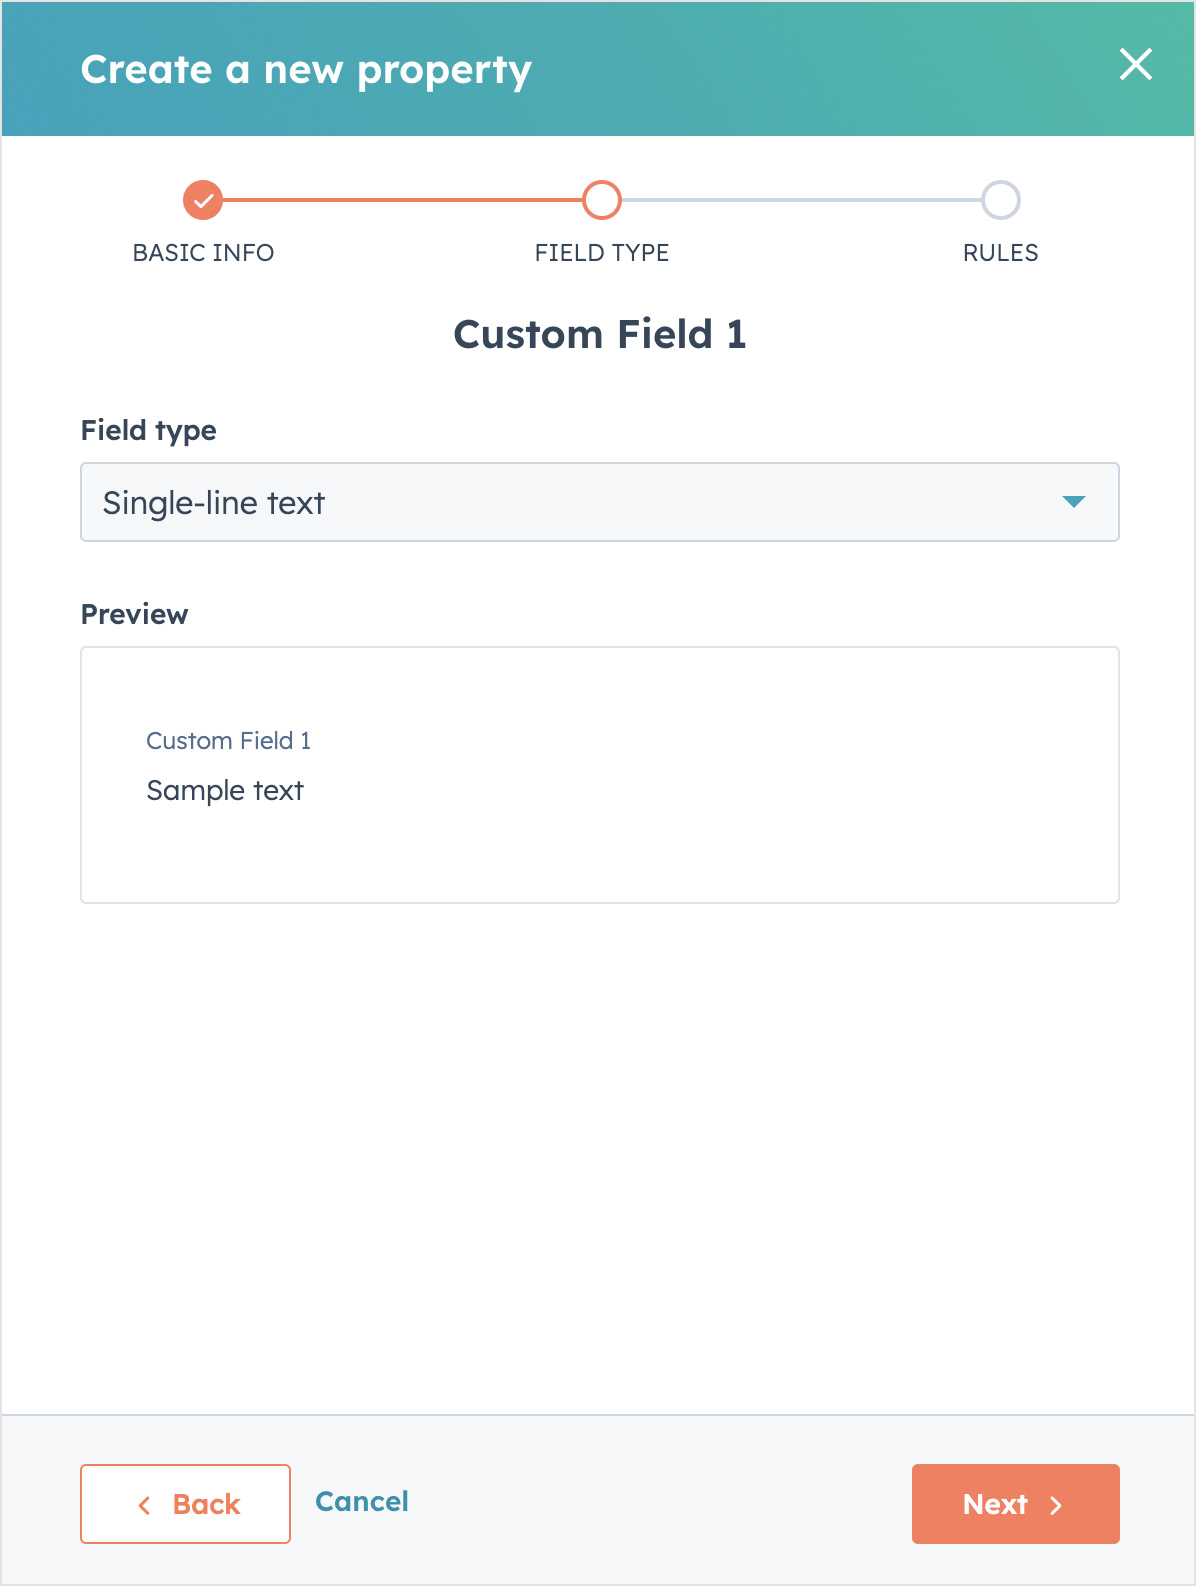
11. In the next window, select the field type – Single-line text. Click Next, and then click Create.
12. Go back to Contacts and click the Edit Columns button in the Contacts table again. Custom Field 1 is now available to display in the table. Enable it and configure the fields to display.